Clothes's Silhouette

7 Steps To Evaluate Your Clothes

Over the last 7 weeks you learned the process to evaluate your clothes, more importantly how to evaluate your favorite outfit so you can learn how to duplicate it. By understanding the design elements of your favorite outfit, you can fill your closet with clothes you love to wear.

In this post I will review all the steps so you can refer back to them for reference. The steps are:

  1. Clothes Silhouette
  2. Placement of Horizontal Lines
  3. Placement of Vertical Lines
  4. Color
  5. Color Combinations
  6. Inside Design Line Shape
  7. Scale of Prints

Clothes Silhouette -- Evaluate Your Clothes

Body Shape Body element

The first step in evaluating your favorite outfit is determining its silhouette and making sure it matches your body’s clues. (To review this post go to: Clothes Silhouette — Evaluate Your Clothes)

The Body Element that gives you clues about the silhouette of your clothes is your Body Shape. There are two categories of body shape which correspond to clothes silhouette:

  1. Angular
  2. Curved

This means your favorite outfit should have the same silhouette as your body.

If you want to duplicate this outfit, then the next time you go shopping, look for clothes that have the same silhouette as your body.

Placement Of Horizontal Lines -- Evaluate Your Clothes

Horizontal lines stops eyes

Step 2 in evaluating your favorite outfit is determining the placement of horizontal lines. (To review this post go to: Placement Of Horizontal lines — Evaluate Your Clothes)

There are two body elements that give you clues about horizontal line placement:

  1. Body Shape
  2. Body Proportion

With respect to Body Shape horizontal lines are never placed in the widest part of your body shape. For example:

  • “A” or pear shape should never place a horizontal line at the hip 
  • “O” or apple shape should never place a horizontal line at the waist 
  • “V” or inverted triangle shape should never place a horizontal line at the shoulders

For any body shape, don’t place horizontal lines in places you don’t want to bring attention to, for example a large belly or bust.

With respect to Body Proportion, place horizontal lines in areas you have a long body proportion and avoid horizontal lines in areas you have a short body proportion.

The placement of horizontal lines is a critical clue to understand and I bet the horizontal line placement on your favorite outfit is perfect for your body. If not, go back to this post and determine your best horizontal line placement. By understanding this one thing you can change your ability to start filling your closet with clothes you love to wear.

If you want to duplicate your favorite outfit, then the next time you go shopping, look for clothes that have the same placement of horizontal lines that match the clues your Body Shape and Body Proportion give you.

Placement Of Vertical Lines -- Evaluate Your Clothes

Vertical Lines

Step 3 in evaluating your clothes is determining the placement of vertical lines. (To review this post go to: https://beautyfashionedsimply.com/vertical-line-evaluate-your-clothes/)

There are two body elements that give you clues about vertical line placement:

  1. Body Shape
  2. Body Proportion

With respect to Body Shape and vertical lines, place them in the widest part of your body shape. For example:

  • “A” or pear shape should place a vertical line at the hip 
  • “O” or apple shape should place a vertical line at the waist 
  • “V” or inverted triangle shape should place a vertical line at the shoulders

For any body shape, place vertical lines in places you want to draw attention away from, for example a large belly or bust.

With respect to Body Proportion, place vertical lines in areas you have a short body proportion.

Placement of vertical lines isn’t as critical as horizontal lines but it can help create overall balance.

If you want to duplicate your favorite outfit, then the next time you go shopping, look for clothes that have the same placement of vertical lines that match the clues your Body Shape and Body Proportion give you.

Color -- Evaluate Your Clothes

Body Element - Color of Skin, Hair and Eyes

Step 4 in evaluating your clothes is determining which color(s) look best on you and which ones you love to wear. (To review this post go to: What Color Looks Best On Me?)

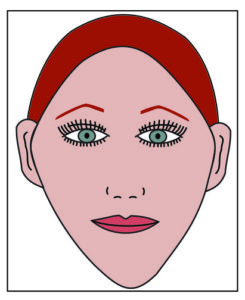
The Body Element that gives you the clue to determine your best color is the Color of Your Skin, Hair and Eyes. This Body Element gives you clues to find your best color because certain colors brighten up your Skin, Hair and Eyes. It’s important to determine a handful of colors which bring your skin, hair and eyes alive.

In my closet you will find jewel tone colors of red with blue undertones, fuchsia pink, and blue with purple undertones. I look great in an emerald green but I really don’t like wearing green. You need to determine not only what colors look good on you but also which ones make you happy.

In the above post I also talk about the concept of your “Power Color.” Your power color is the one that makes you feel the most alive when wearing it. Everytime you put it on, your energy level increases. You feel like you can tackle anything. My power color is red with blue undertones.

Now that you know the 3-4 colors you love to wear and your “Power Color,” the next time you go shopping look for clothes with these colors in them. If they’re not there (not including your neutral colors) leave it on the rack. Don’t take it into the dressing room to try it on.

Color Combinations -- Evaluate Your Clothes

Color Contrast Profile

Step 5 in evaluating your favorite outfit is determining the color combinations of your favorite outfit. (To review this post go to: Closet Color Scheme — Evaluate Your Clothes)

When considering the right color combination for you, you need to consider which colors can be combined and the relative lightness and darkness of these colors.

The body element that gives you the clue about color combinations is the color of your Skin, Hair and Eyes. To determine which color combination works best for you, you need to first determine your Color Contrast Profile. This means you’re looking at the difference in the relative lightness and darkness between the colors of your skin, hair and eyes.

When there is a:

  • Small difference — Low Contrast
  • Medium difference — Medium Contrast
  • Large Difference — High Contrast

Color Combination

To determine which color combination looks best on you, start with the combinations taught in Color Theory and your Color Contrast Profile:

  • Monochromatic — Low Contrast
  • Analogous — Low Contrast, Medium Contrast
  • Triadic — Medium Contrast, High Contrast
  • Complimentary — High Contrast

Relative Lightness And Darkness

In considering the relative lightness and darkness of the above color combinations, look at the saturation between the colors:

  • All the colors have the same saturation level — Low Contrast
  • There is some variance in the saturation level — Medium Contrast
  • Large variance in the saturation level — High Contrast

It’s time to look at the colors in your favorite outfit, now that you understand color combinations in general and which are best for you. Look at all the colors in the print and determine which color combination in Color Theory it reflects. Then look at the relative lightness and darkness of the colors.

Do the color combinations and their relative lightness and darkness of your favorite outfit match that of the clues from your skin, hair and eyes? If so, you now understand which color combinations work best for your skin, hair and eyes.

If not, look in your closet for the color combinations that match the clues your Color Contrast Profile give you. Do your skin, hair and eyes pop more? Play with it until you find the combination that’s right for you.

Now that you understand the best color combinations for you, when shopping to fill your closet full of clothes you love to wear, look for clothes with this color combination.

Design Line Shape -- Evaluate Your Clothes

Face Shapes

Step 6 is determining the inside design line shape. (To review this post go to: Design Line Shape — Evaluate Your Clothes)

Inside design lines include:

  • Neckline
  • Collar
  • Pockets
  • Cuffs
  • Plackets
  • Seams to create design detail

The body element that gives you the clue to design line shape is your Face Shape. Face Shape and design line shape have two categories:

  • Angular
  • Curved

If you have an angular face then look for angular design lines. However, if you have a curved face then look for curved design lines.

This clue isn’t as critical as the other body elements and it may be difficult to find an outfit with totally curved or angular. Jeans are a very good example: curved front set-in pockets and angular back patch pockets. Look at the overall feel: does it feel more angular or curved?

When you find an outfit that 100% reflects your body clues you will firmly tap into your confidence and personal power.

Print Scale -- Evaluate Your Clothes

print scale

Step 7 and the final step in evaluating your favorite outfit is to look at the print scale. (To review this post go to: Print Scale — Evaluate Your Clothes)

You will find a print’s scale to be from small to large. Print scale is something that most designers and women don’t think about but it affects how we feel in an outfit.

The Body Elements that give you clues to Print Scale are:

  • Color of Skin, Hair and Eyes
  • Body Proportion
  • Body Frame Size

To determine your print scale, look at your Scale Strategy. This is determined by combining your clues from: 

  • Color of Skin, Hair and Eyes
  • Body Frame Size

This is your overall Scale Strategy. Then you look at your Body Proportion for a particular area. If you’re short in an area, decrease the scale in that area. However, if you’re long in an area increase the scale in that area.

When shopping and looking at a top, dress or pants look at the print scale and ask yourself, “Is this print scale best for me?”

What To Do If You’re Not Finding Clothes You Love To Wear

Now that you understand your body elements and the clues they give you, you can set out to find clothes that reflect them in your local stores or online.

A big problem arises. You can’t find anything that totally reflects everything. Some are ok but horizontal lines aren’t in the right places and the fit isn’t totally there.

Alterations

The answer is to hire a tailor/seamstress to alter the clothes to transform them into ones you love to wear. This tailor/seamstress will become a part of your team like your hairdresser, manicurist and masseuse.

You may think it will be too expensive. But think about the cost per wearing. You will be wearing it more because you love to wear it. So the cost per wearing goes down as a result of wearing it more often.

Also consider how you will feel in it and your added confidence. How will you act differently when you feel like you can conquer the world? This alone is worth the added cost.

Custom

What if you can’t find anything and altering isn’t possible? Have the clothes custom made. Yes that costs even more but for all the reasons above it’s worth it.

This is the avenue I have had to take in many cases. I’m tall and most ready-to-wear tops and pants don’t have the length I need. Also much of my life I had a very small waist compared to my hips. The pants center back crotch length wasn’t long enough and the waist was way too big. My answer is to sew my own clothes.

In a future post I’ll talk about alterations and custom clothes. They might be a good alternative for you to fill your closet with clothes you love to wear.

Did you learn anything new during this series of posts? Do you now see clothes in a new way? Make a comment below telling us about your experience.

I will be starting a new series of posts related to your accessories and determining which ones enhance your body based on your Body Elements. The next blog post is called Accessory Shape — Evaluate Your Accessories.

Wear Your Greatness!!

Leave a Comment

Your email address will not be published. Required fields are marked *